Bionics and Control Systems Laboratory at Syracuse University
Mechanical Design Engineer
Background
The summer after my junior year, I began working for my professor at Syracuse University's Bionics
and Control Systems Laboratory with several other students.
The premise of the research was to develop a method where patients suffering from lower-limb paralysis,
(specifically those who suffered from a stroke or traumatic injury to the spinal cord), could initially
exercise their muscles after being bedridden for a significant amount of time.
This could potentially allow patients to gain the strength to walk after multiple iterations of
this assisted exercise by exploiting the muscles they already have.
This is also referred to as gait rehabilitation.
There are two main steps for this process.
The first step is to utilize the stationary bike.
The bike itself features a motor connected into the drivechain system,
and cloth electrodes that are placed on the patient's thighs.
In short, the way this works is the electrodes involuntarily contract the patient's muscles and forces
them to pedal.
This works in conjunction with the motor to assist the pedalling motion as the electrodes alone are
not enough to do so.
Exercising with the bike for multiple sessions can build enough muscle to the point where the patient
can walk utilizing the lower-limb exoskeleton suit.
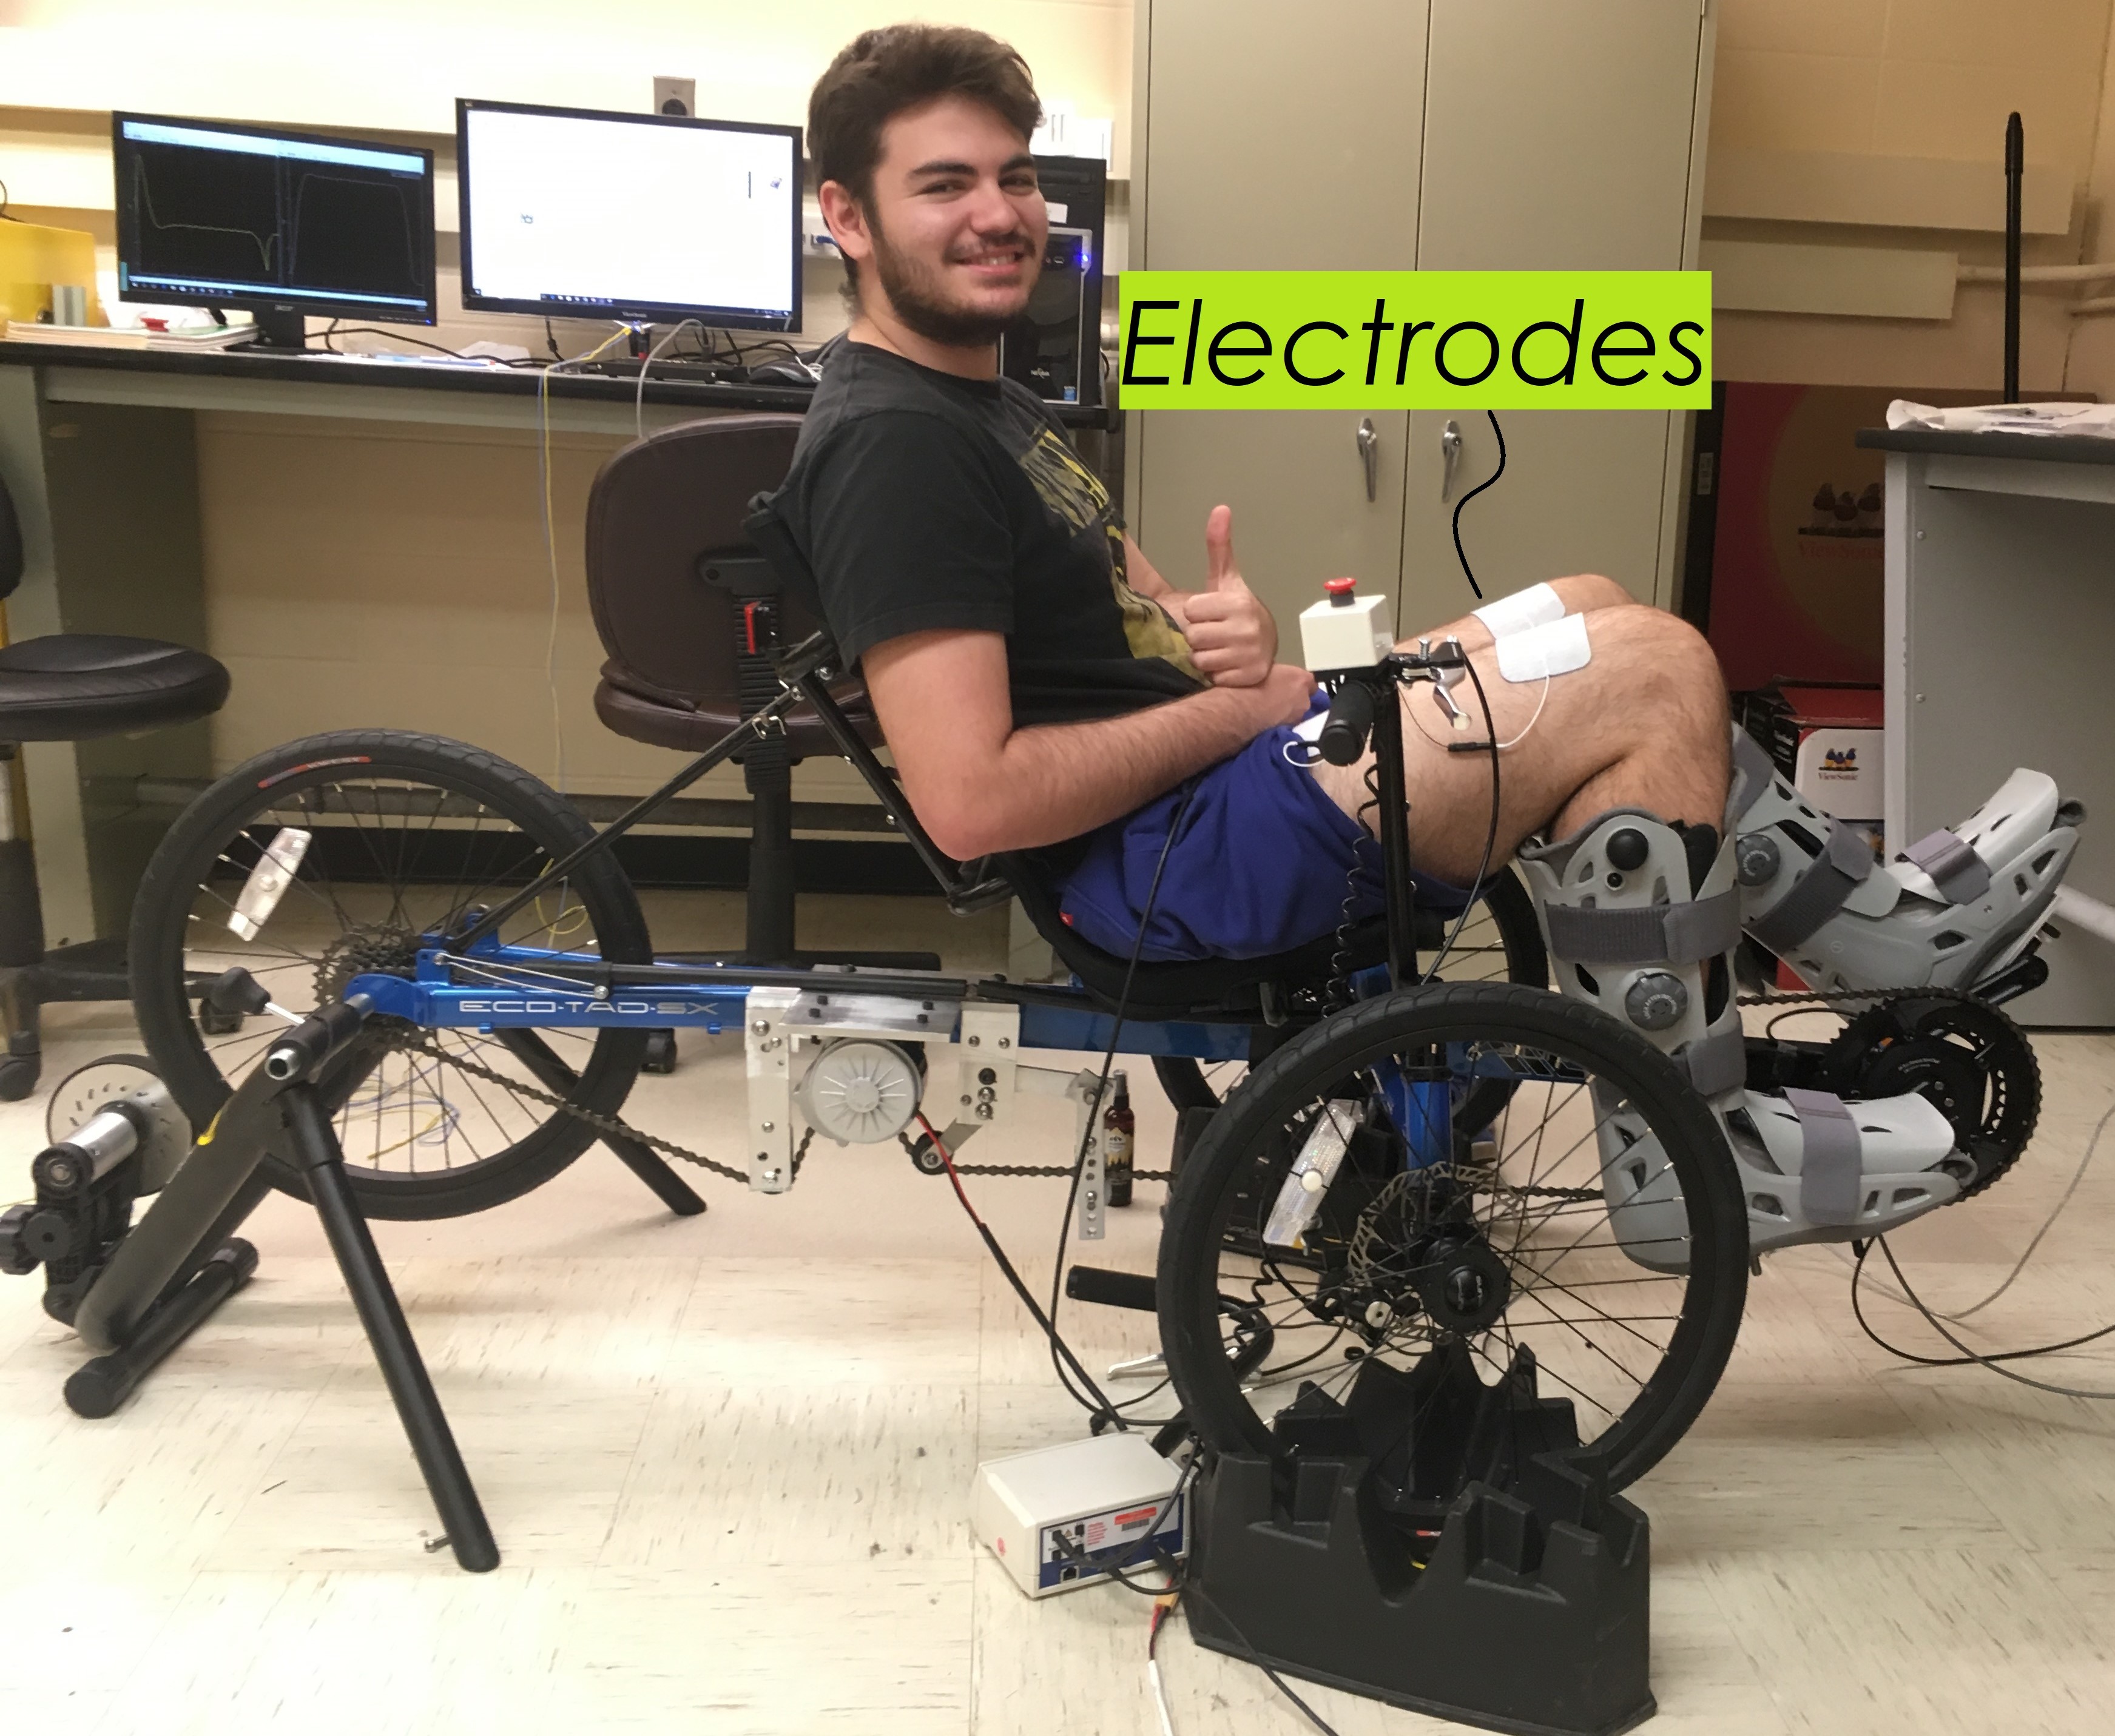
FIGURE 1.
Constantine Preparing for Exercise on Tricycle
Exoskeleton Suit Design
Mechanical Design Engineer
Background
The summer after my junior year, I began working for my professor at Syracuse University's Bionics
and Control Systems Laboratory with several other students.
The premise of the research was to develop a method where patients suffering from lower-limb paralysis,
(specifically those who suffered from a stroke or traumatic injury to the spinal cord), could initially
exercise their muscles after being bedridden for a significant amount of time.
This could potentially allow patients to gain the strength to walk after multiple iterations of
this assisted exercise by exploiting the muscles they already have.
This is also referred to as gait rehabilitation.
There are two main steps for this process.
The first step is to utilize the stationary bike.
The bike itself features a motor connected into the drivechain system,
and cloth electrodes that are placed on the patient's thighs.
In short, the way this works is the electrodes involuntarily contract the patient's muscles and forces
them to pedal.
This works in conjunction with the motor to assist the pedalling motion as the electrodes alone are
not enough to do so.
Exercising with the bike for multiple sessions can build enough muscle to the point where the patient
can walk utilizing the lower-limb exoskeleton suit.

FIGURE 1. Constantine Preparing for Exercise on Tricycle
Exoskeleton Suit Design
Once a substantial amount of the patient's muscle has been built the exoskeleton can be used. This is where I came in. My main assignment was to design and fabricate the mechanical frame for an exoskeleton suit. One of the major requirements was that it would be adjustable such that it can fit 99% of people according to a data sheet on sizes of humans in different areas. The design also needed to be comfortable yet firmly attached, include rotary encoders, and include cable attachment points with force sensors. Shown below are the results of my work.
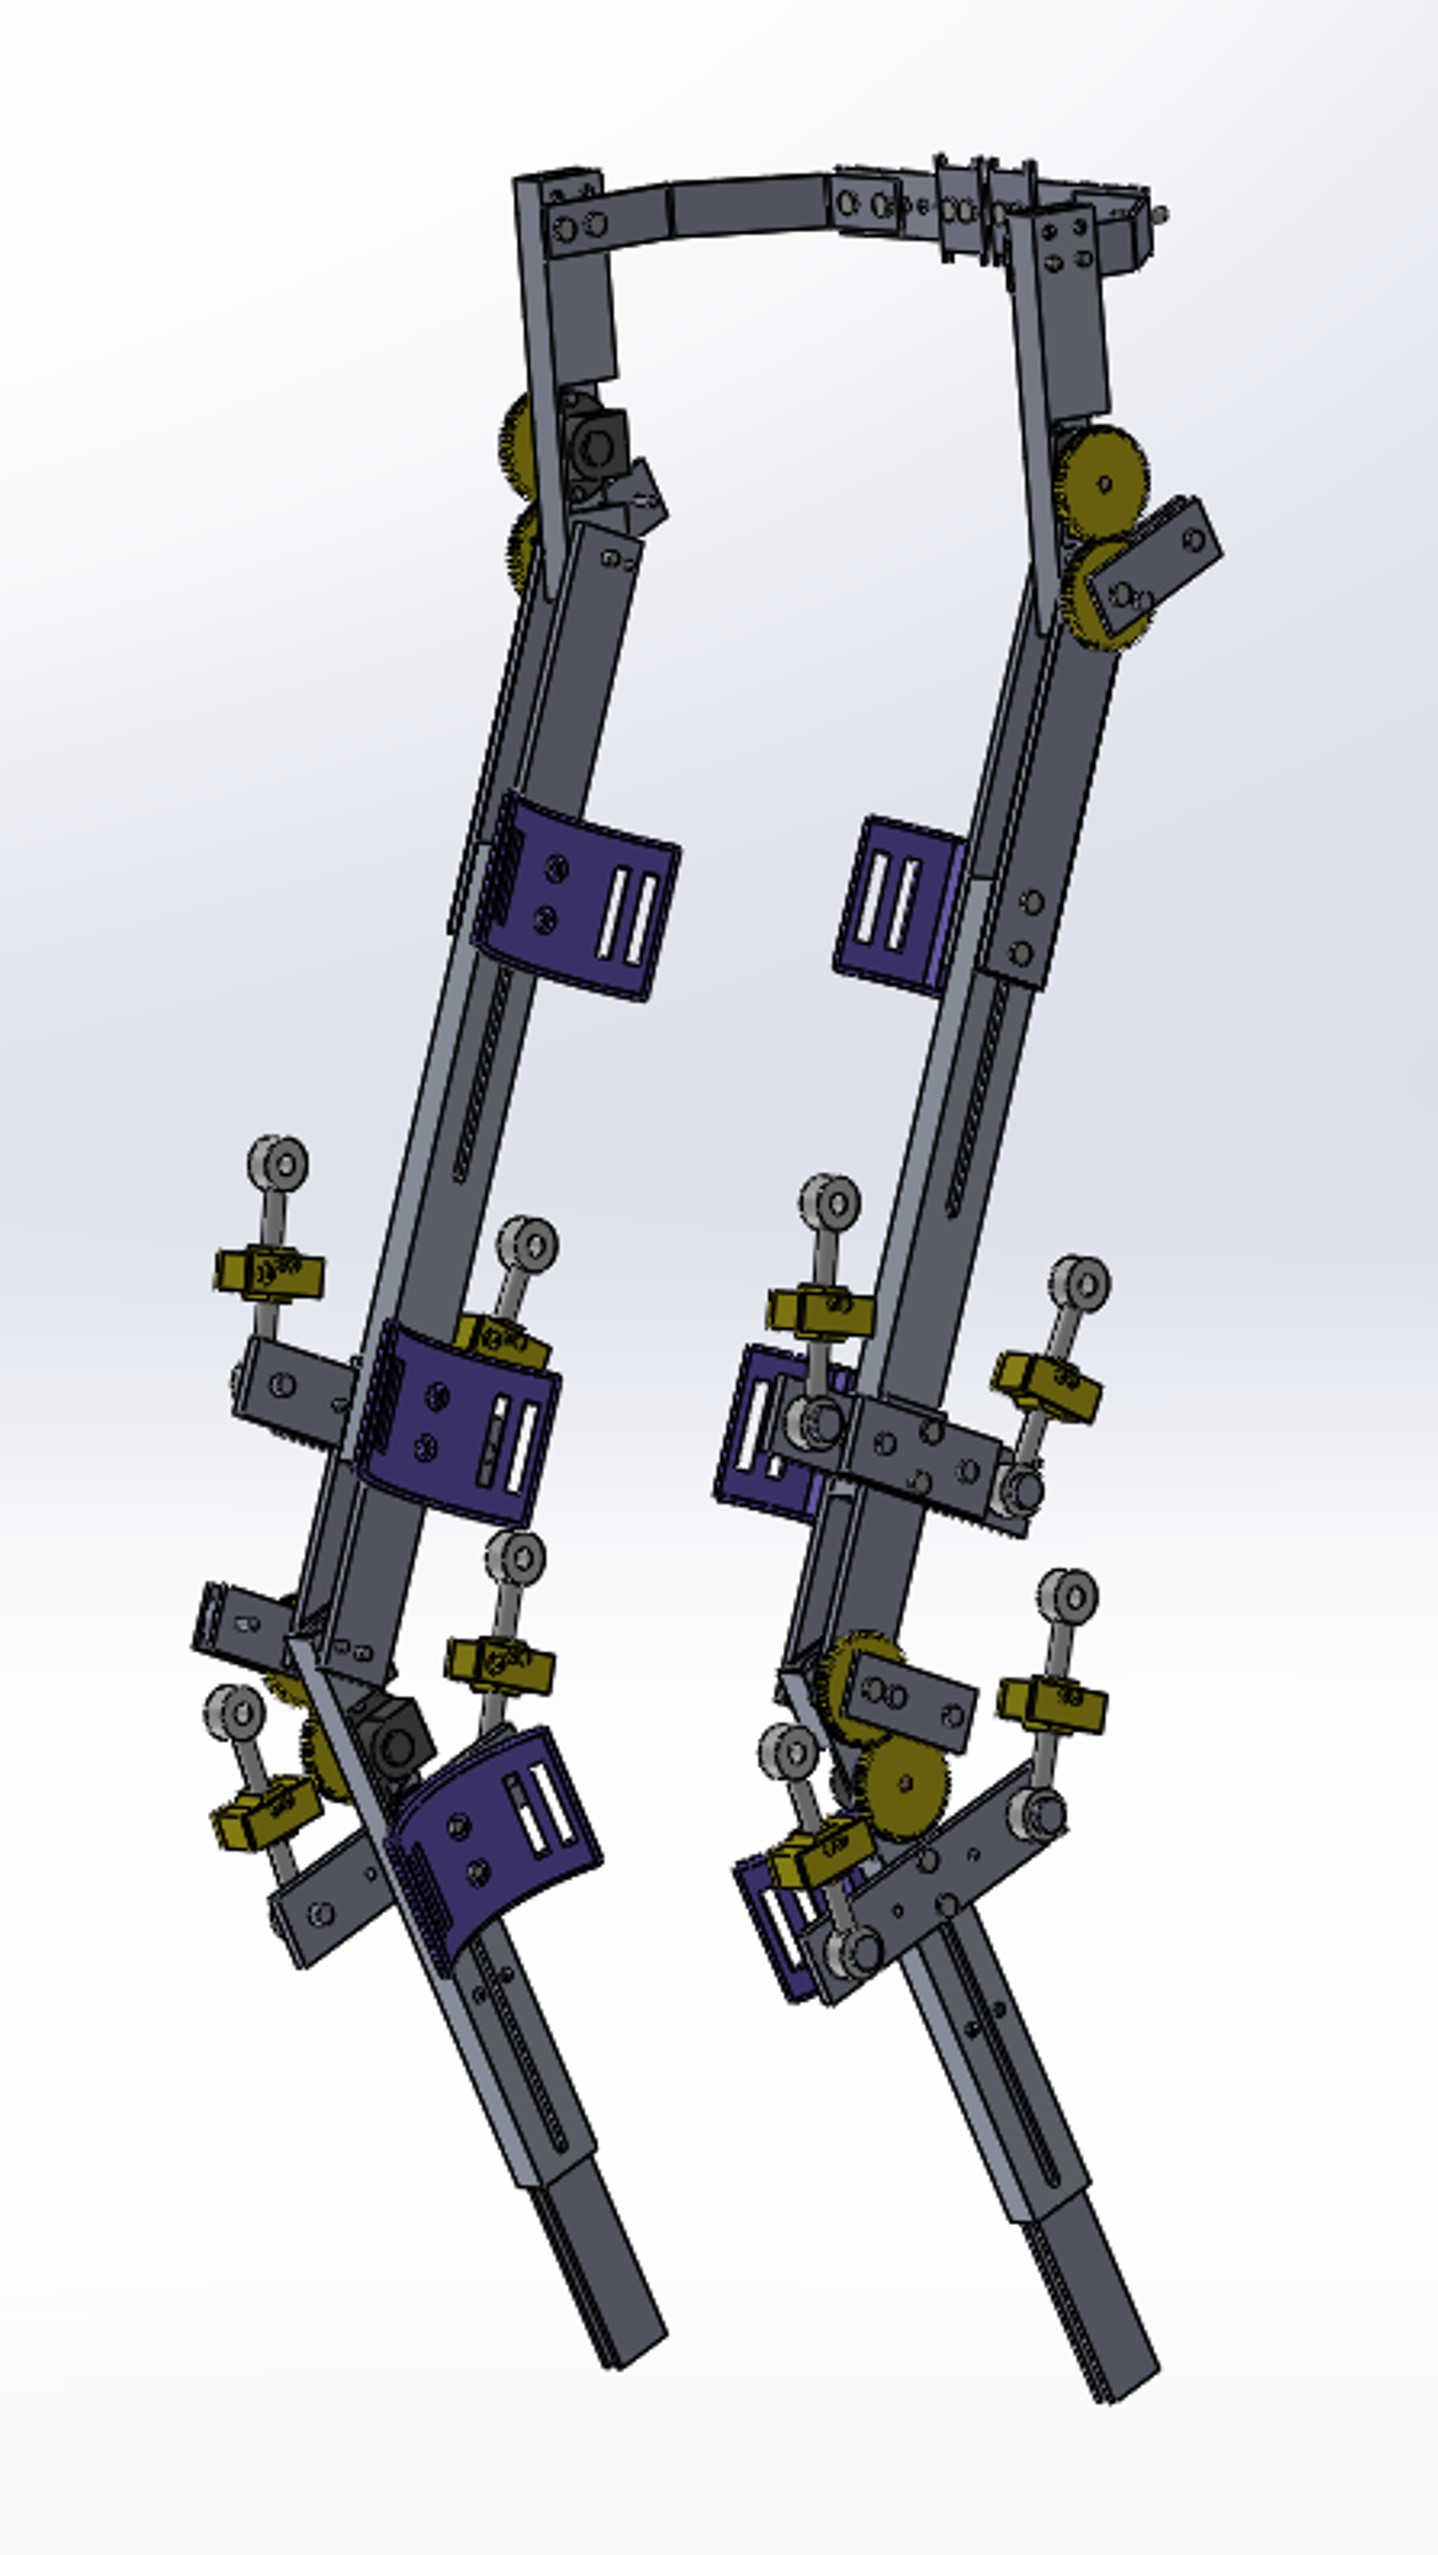
FIGURE 2. Exoskeleton Suit SolidWorks Assembly featuring Force Sensors (Yellow Boxes), Encoders (attached to Yellow Gears), and Strap Mounts (Purple)
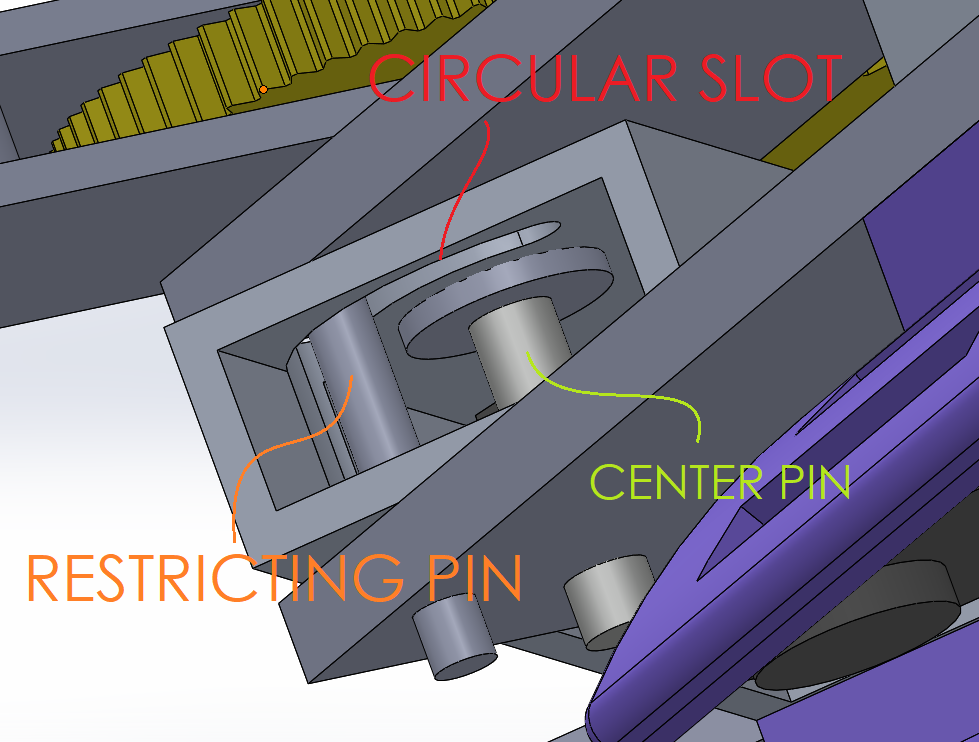
FIGURE 3. Knee Guard Safety System in Assembly with Restricting Pin
FIGURE 4. Early Prototype of Exoskeleton Suit Knee-Thigh Joint Test Stand
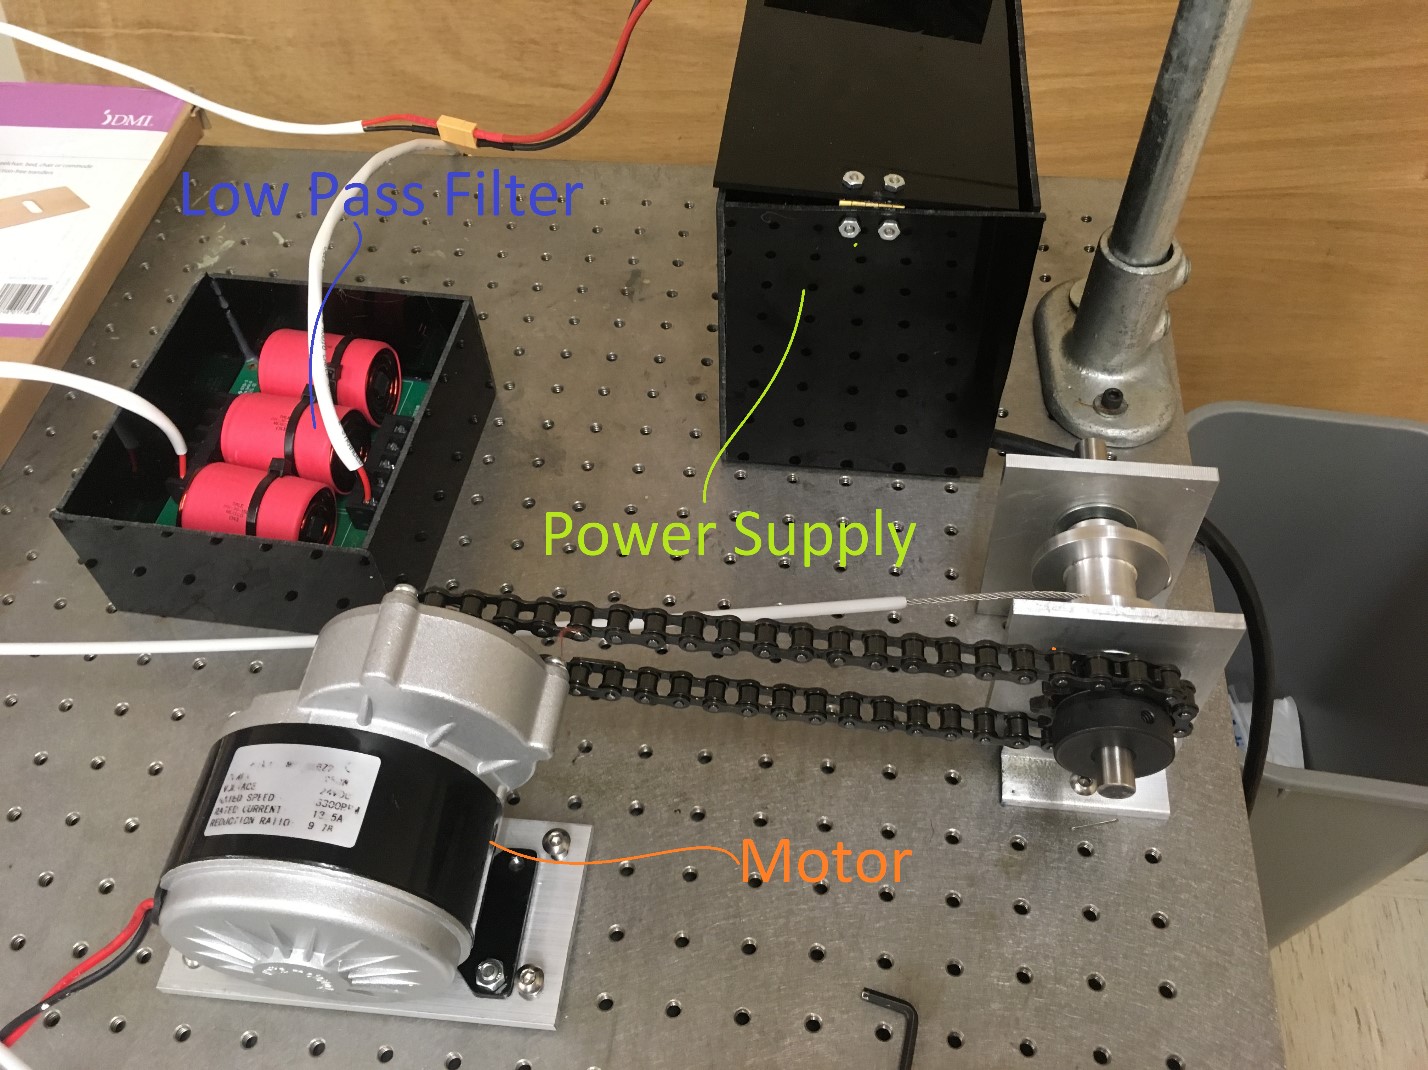
FIGURE 5. Motor Setup for Knee-Thigh Joint Test Stand
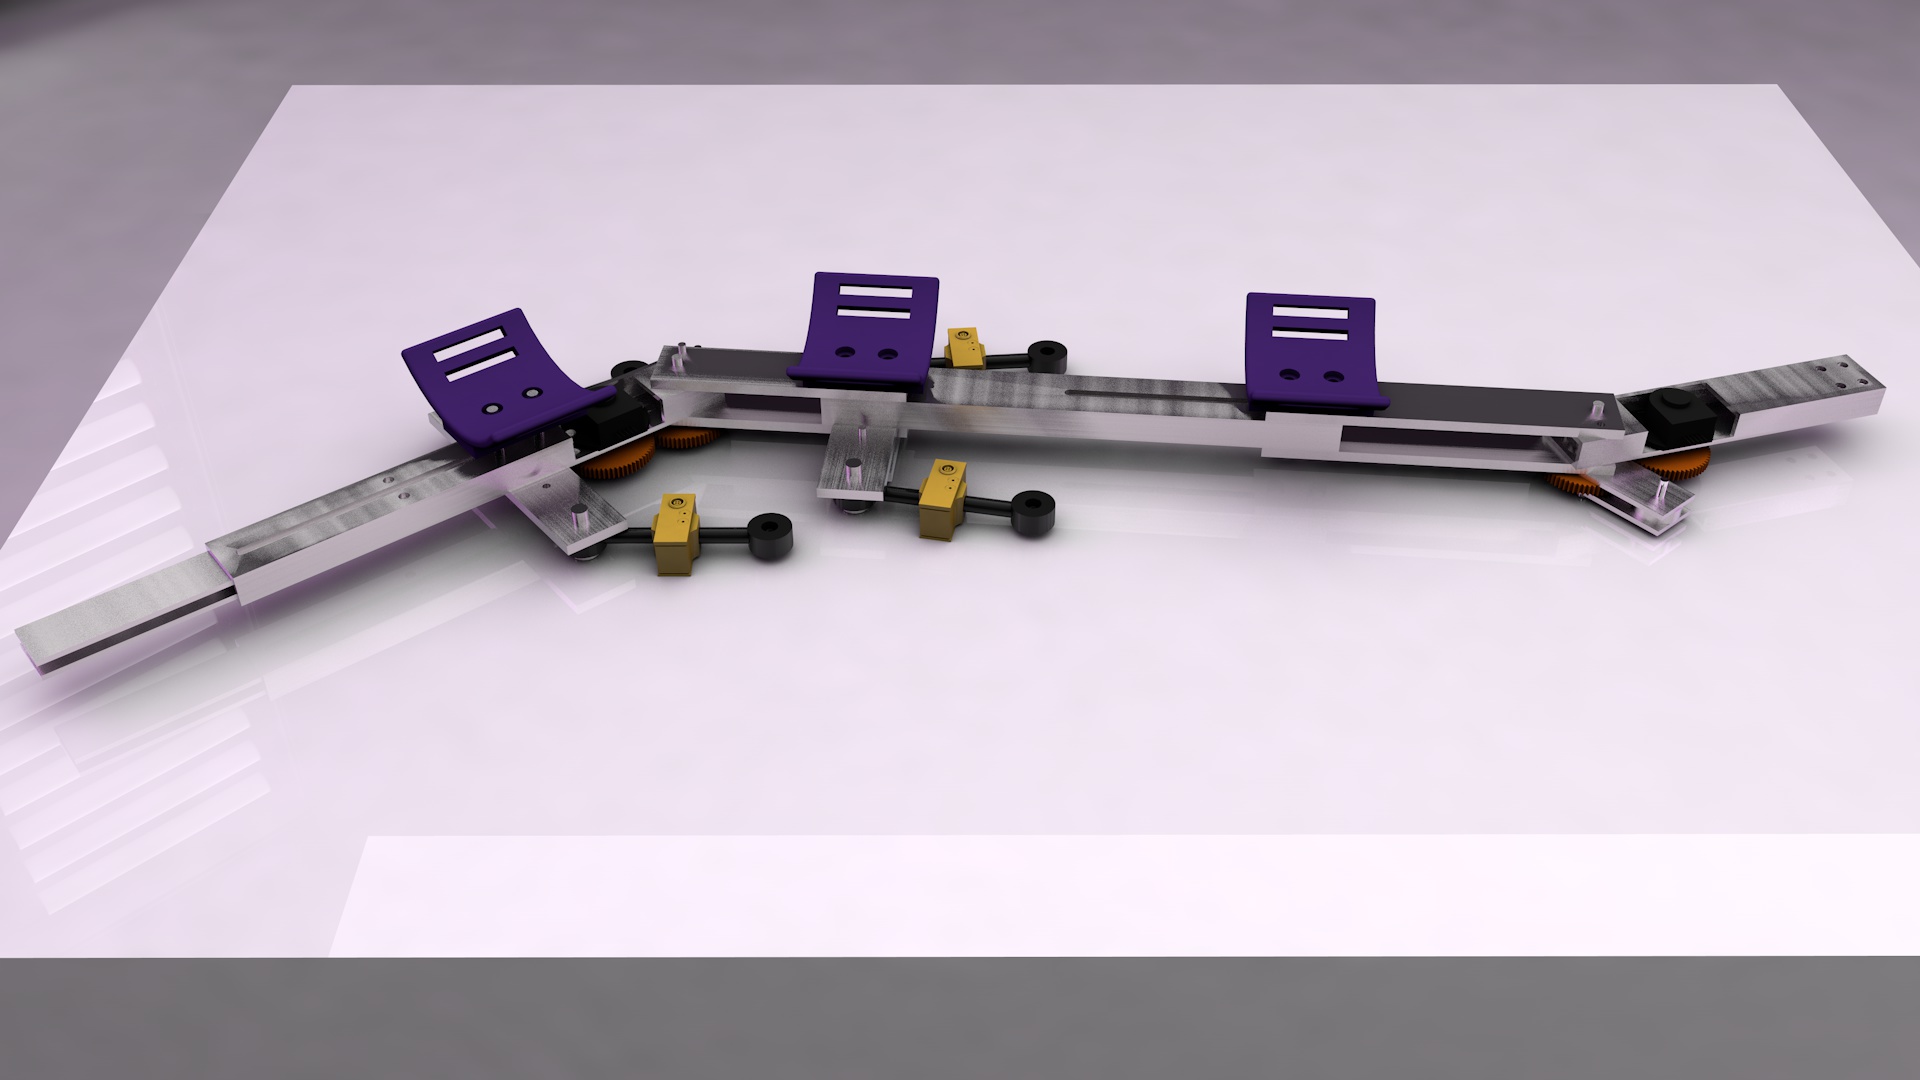
FIGURE 6. Single Leg of Exoskeleton Suit Assembly Rendering